What Are They Saying About Granite Countertops In 2019?

What Are They Saying About Granite Countertops In 2019?

Though granite has had its name in forward motion since the 1980s, it is more in the limelight now than it has ever been. Originally, granite was used in more luxurious kitchen and bathroom settings and was one of the more expensive choices for the rich and famous, as was marble.

Granite Today

In 2019, granite is considerably less costly, available on a wider scale and has progressively gained popularity because of its enduring quality, beauty and value. The changes and upgrades with granite in 2019 continue to make it more desirable and appealing. Here is some of what is currently occurring with granite counter tops.

1. Finishes

Finishes are what have given granite a renewed appearance today. Polished granite is at the top of the list of choices as it is the most appealing to current homeowners. Its glossy surface is mirror like, luxurious and brings a fluid look to a kitchen or bathroom space.

Other available granite choices include a honed finish which brings a matte or dryer look to granite. Minimalism is a trend and a matte finish granite helps to pull off an uncomplicated and streamlined kitchen design. Honed granite is also a nice touch for a more rustic and industrialized look in counter top selections and appeals to those who like the concept of a laid back look in kitchen counter tops.

There are also other granite finishes in sumptuous leather looks that are conducive to modern, natural and old-world features that can enhance almost any type of home today.

2. Patterns

Granite patterns run the gamut from whirls, veins, and specks and are all part of 2019 trends in granite pattern choices. Many of these patterns are present in the varying types of granite that are available to homeowners and businesses. Patterns can resemble veined marble or be more contained with minimal speckling, while whirls create a modern art and spatial effect that gives contemporary homes today a grand and open appearance. With all the versatility in patterns presented in 2019, there is a pattern style that fits any home design and is adaptable to most any homeowner’s taste.

3. Colors

Granite counter top colors that are trending in 2019 appear to be of the deeper and darker variety. Dark bluish-green and blue predominate while other colors that are emerging include gray, white, orange, red, beige, black, green and brown. Many of these distinct colors are actually due to the formation of crystals within the granite pieces themselves and every piece or slab is different in coloration.

Both black and gray granite are appearing in 2019 and blend very well with modern and contemporary kitchen spaces and usually correlate well with lighter wood cabinets. Beige and brown granite counter tops are also favored and are quite a bit easier to integrate with most kitchen designs as they can be combined with almost any cabinet and fixture choices. White granite is a bold choice and usually has different flecks of color yet blends well with cherry wood and is great choice to enhance small kitchen spaces and open concepts.

In viewing the various aspects of current granite counter top offerings, it is obvious that finishes, patterns and colors are what defines granite counter tops in 2019 and with the number of choices and combinations available, there is no limit to what can be achieved with a granite counter top selection. If you really want granite counter tops but aren’t sure what choices to make, complete the contact form and an expert will get back to you to help you fulfill your granite counter top dreams.

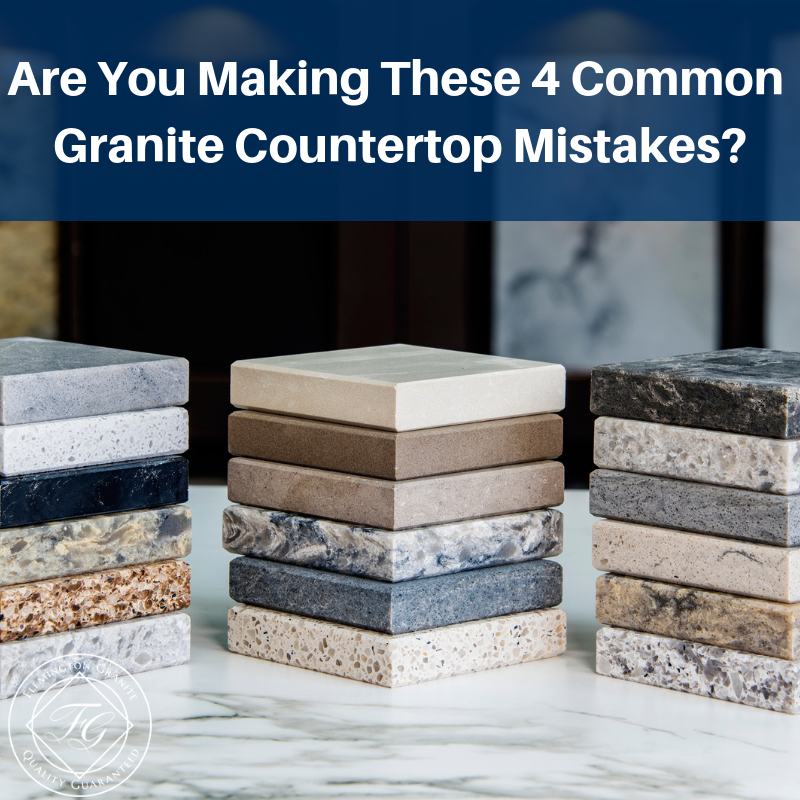
Are You Making These 4 Common Granite Countertop Mistakes?

Are You Making These 4 Common Granite Countertop Mistakes?

There are mistakes that can be made with granite counter tops and in order to steer clear of them, awareness of the pitfalls with granite are important. Mistakes can be avoided and four of the more common mistakes with granite countertops include:

1. Think Wholesale

If you are planning on purchasing granite for countertops, there is the option of utilizing wholesale sources as opposed to paying full retail. Granite countertops offered at wholesale prices are of similar quality as retail, but they can be considerably less expensive.

2. Choosing a Color/Design/Edging and Thickness

Once you have found a granite slab at wholesale or retail, make sure both the color and pattern design are going to coordinate with your kitchen and surrounding spaces before any installation occurs. You don’t want your choice to create a color clash with kitchen cabinetry, fixtures, appliances and any other items in a kitchen area.

Another consideration that goes along with color choice and design is edging. Choosing the appropriate type of edging should be decided on before any countertops are installed. Once both a granite slab and edging are in place, no changes can be made to either one without removing the granite slab itself and reinstalling the whole works.

You also need to think about granite thickness or width as granite is usually available in different widths of 3/4 inches and 1-1/4 inches. The only way to gain greater thickness is gluing slabs together, and that is not a solution for thickness that works out well.

3. Utilize a Professional Installer

After you have made a granite choice and require installation, you want to ensure that the persons (or person) completing your installation are experts and have the credentials and experience to follow through with all phases of the job. An installation improperly executed can affect the look of your countertops as well as their lasting ability.

4. Sealing and Maintenance

Another important issue with granite is to not take its durability for granted. Though granite is extremely hard-wearing, it is vulnerable to heat damage as well as harm from chemicals, wine, sharp instruments, and various oils.

Sealing is important as granite is a porous material and can be stained or damaged. Without a coat of sealant applied intermittently, granite countertops are subject to the wear and tear of everyday use that can quickly expose granite to different mishaps, such as the spilling of acidic fruit juices and other foods that can wear down the sealants on granite.

Granite’s maintenance hinges on using wooden cutting boards to prevent countertop surface nicks. Trivets or potholders should also be used to shield the countertops from high heat produced through cookware, other utensils, and small appliances. Oil spills should also be avoided as they can stain granite counter tops. The key to maintaining spills is to take care of them quickly before they are absorbed. As far as cleaning granite is concerned, avoid glass cleaners, chemical, and solvent-based cleaners, and acidic cleaners (vinegar and lemon). Daily cleaning can be accomplished with mild dish detergent and a moistened cloth. There are also cleaners specifically designed for granite that can be used.

Simply following through with the solutions given here to alleviate common granite counter top mistakes will help in the prevention of any number of problems. Whether you are purchasing, installing or maintaining granite countertops there are simple solutions. If you have any questions or concerns with granite counter tops and mistakes that can occur, fill out the contact form and a granite expert will get back to you as soon as possible with the answers you need.

How To Protect Your Outdoor Granite Countertops

How To Protect Your Outdoor Granite Countertops

Today, outdoor kitchens are more popular than ever. People are venturing out to enjoy nature more than ever and homeowners are finding it much more convenient to cook outdoors rather than heating up the house in the warm summer months. There are even outdoor kitchens designed to be used year round. One natural stone that is finding a home in outdoor kitchens is granite. Granite is one of the hardest stones on Earth and is perfect for your outdoor countertops and tables. However, there are some tips you should follow to protect your granite from damage outdoors.

Weather Protection

Because granite is natural, you may think that weather could not possibly damage the surface. However, rain, snow, sleet and freezing temperatures as well as bright sunshine beating down on the granite can cause damage. You want to be sure that your counter fabricator uses exterior glue on the edges to avoid damage from the freeze and thaw cycle. Without the glue, your countertops could separate from the base. When you are not using your granite countertops in the winter, keep them covered. Snow and ice can cause the granite to wear down more quickly. Use umbrellas, awnings and other types of coverings in the summer to keep the sun from beating down on the granite at all times.

Use a Sealant

One of the best ways to protect the surface of your granite is to use a sealant. You can seal your granite countertop yourself without professional assistance in about 20 minutes. If you are not comfortable with the sealing process, your counter fabricator can perform the action for you.

Clean Your Counters

Although you probably know to keep your counters clean and sanitary, it is especially important for your outdoor counters. If you spill something on the counter, be sure to wipe it up quickly. This is especially important if you spill something like mustard, wine, juice or coffee. If you allow those substances to sit on the counter in the sun, your counter could stain. Always use a non-abrasive cleaner on your granite countertops to avoid damage.

If you are interested in granite counters for your outdoor kitchen, contact us today to learn more. Not all granite countertops are the same and some are better suited for outdoor use than others. We can guide you through the process and help you choose the countertops that will work best for your family. Fill out the easy form or give us a call today.

Can I Install Granite Countertops Myself?

Granite countertops have a timeless beauty that brings a look of luxury to any room. Caring for granite countertops is simple but installing them is not. Unfortunately, there are homeowners who believe that they can install granite and other natural stone on their own. Because natural stone can be very expensive it is best to leave the installation to professionals.

Proper Support and Leveling

One of the hardest aspects of installing granite countertops is that they must be completely level and adequately supported. Professional installers understand how to adjust the stone so that it fits properly. Unlike other types of countertop like laminate and butcher block, it is not possible to simply glue the counter to cabinets without support. Granite is extremely heavy and must have the proper support. Rebar and other reinforcement are often necessary to adequately support the counters so they do not crack under their own weight.

High Quality Results

It is not difficult to identify a granite counter that has been installed as a DIY project. Slabs are uneven, the grout work is obvious and incorrect. The counters may also have cracks or stress fractures because they are not supported properly.

Experience and Equipment

Installing granite can be a time-consuming, difficult process. You will spend a significant amount of time consulting manuals, online videos and other guides to help you throughout the installation. In addition, you will need to have specific tools to cut out sinks and appliances or to add a backsplash. If your counter has odd angles, you will need to cut the counters to fit which can be difficult without the proper tools. A professional has the right tools and the experience to get the counters installed quickly and with less inconvenience to your family.

Adjustments

Even if your granite is cut to your measurements and specifications, you may need to have adjustments when the stone is installed in your home. Cutting granite in a closed environment can be difficult and can lead to dust in carpets, ducts, clothing, dishes and screens. Professionals close of the room where they are installing the granite to protect the rest of your home. In addition, they use wet saws to cut the granite and reduce dust.

If you are considering granite countertops for your home, you need to work with a professional to be sure your counters are installed properly. Complete the form online or give us a call today.

Can Countertops Have An Impact On Home Resale Value?

Can Countertops Have An Impact On Home Resale Value?

Even when people plan on keeping their home for a very long time, concerns about resale value always weigh heavily on most homeowners. A lot can change in the course of the day, let alone a lifetime, and one never knows when one might not need to convert an asset like a home into something a bit more liquid. So, at the very least, a well-maintained, high-value house is a wise investment.

The problem with this is, every decision you make about your home both interior and exterior, require you to weigh its effect on your home’s resale value should you choose to treat your home as the investment it is. One of the biggest quandaries in this vein would probably be the effect of countertops. How much of an effect do they have, and how severely needed our new countertops in order to ensure optimal resale value for your home?

Unsurprisingly, this isn’t an easy question to answer, and there is no single one right answer to it. There are a great many factors when dealing with countertops that can affect your home’s resale value, and today, were going to look at this from a logical, neutral point of view. We don’t claim to have all the answers, but we’re confident that after we’ve gone over this, you’ll be a will to make an informed decision based on your specific scenario. At the end of the day, that’s all any of us can really do!

The State of Your Existing Countertops

Obviously, the biggest factor in deciding whether or not you need to replace your countertops state of your existing ones. This goes beyond just the shape that they’re in – of course, if your countertops are worn, beaten or degraded, it’s a given that they need to be replaced. No, the real question is, how versatile are they? Are they neutral, matching both old and new looks? Do they look dated?

A prime example would be an older house still adorned with gold flaked formica countertops; these of course being a very popular style in the 1970s and 1980s. Even if such countertops are in excellent condition, being so dated, still need to be replaced with something a bit more modern, or at least timeless and neutral.

Conversely, there are many styles of countertops not beholden to such trends. Many types of marble, quartz and granite can be very timeless, though in these cases, you’ll want to consult with someone with an expertise in stonework to determine which ones are neutral enough to present plenty of opportunity for buyers to easily redecorate the kitchen and bathroom without having to replace such an expensive feature.

Where Countertops Matter Most

There tend to be three places in your home or countertops are a common feature. These are your kitchen, bathroom and occasionally, your washroom. Of these three, the most important, the place where you’ll want to spend the most money to update, will be the kitchen. The kitchen is a social hub in a house, and one of the most memorable rooms therein that everyone will consistently see.
Buyers are much more forgiving of an outdated bathroom, which is something far more affordable for them to take on as a projects to update, then if the problem is your kitchen.

So, how much do new countertops impact your resale value? Quite significantly, depending on your existing countertops, when dealing with your kitchen. To learn more about this and other variables which your countertops can affect, fill out our contact form below or call us today!

How to deep clean granite countertops

How to deep clean granite countertops

Granite countertops are pretty durable, resisting heat as well as normal wear and tear that could damage other countertop surfaces. When granite is properly sealed, it is also very easy to clean. Despite the fact that granite is pretty stain resistant, there are some substances that can leave stubborn stains, like coffee or oils. These tips can help you get your granite counters back to their original beautiful condition without causing further damage.

Sealant Differences

Before using any type of cleaner on your granite counters, you need to know what was used to seal the surface. Some granite has a resin treatment applied at the factory while others must be sealed periodically. The sealant’s purpose is to protect the granite, which is porous, from absorbing items that may get spilled on the surface. Check with the manufacturer to learn how your granite was sealed.

What Not to Do

Never use an acid-based cleaner on your granite surfaces. These include products with lemon, orange, vinegar or bleach. These types of cleaners can degrade the sealant and leave stains on your countertop. Never use abrasive cleaners such as scouring pads or grainy powdered cleaners as they can also damage the sealant.

Cleaning Granite

Daily cleaning of granite is simple as you just need to wipe the counter down with dish soap mixed with a small amount of warm water. Use a soft washrag and dry the surface with a hand towel. You can disinfect granite by mixing equal parts of isopropyl alcohol and distilled water in a spray bottle. Allow the solution to sit on the counter for two or three minutes and then wipe it down with a soft cloth.

Removing a Stubborn Stain

If you have a particularly stubborn stain, such as the cooking oil your spouse neglected to wipe up, create a paste of baking soda and water for an oil-based stain. If the stain is water-based, use hydrogen peroxide instead of water. Spread the paste over the stain, cover it and allow it to remain for several hours. Wipe away the residue and clean the area using a dab of dish soap on a soft wash cloth.

If you are considering granite countertops for your home, contact Flemington Granite today to learn what options are available. Our friendly customer service staff can help you choose the perfect granite for you and your family. You can reach us by phone or by filling out the easy form online.

Can A Shelf Liner Really Extend the Life of Cabinets & Drawers?

Can A Shelf Liner Really Extend the Life of Cabinets & Drawers?

You probably remember your mother or grandmother lining the shelves of their kitchen cabinets and drawers. If you asked them why, you probably got a variety of explanations, from protection of the shelving to avoiding food stains. It was just something that had always been done. However, if you have ever moved into a rental home or a home that had a previous owner who used shelf paper, you may recall pulling out old, gummy paper with crumbs and dirt, wondering why on Earth this stuff was necessary.

Extending the Life of Your Cabinets

Although your mother and grandmother may have thought shelf paper would extend the life of their cabinets, this is not exactly true. Shelf liners do keep the inside of your cabinets and drawers cleaner and more sanitary. They can protect your cabinets from damage that may occur when dishes have water on them from the dishwasher. They can also help you avoid the rings that can occur from oils left on the bottom of containers. However, a shelf liner needs its own attention in order to perform properly.

Avoid Sticky Versions

Sticky shelf liners can be difficult to remove and, if you have to scrape aggressively to remove it, you could cause significant damage to your cabinets. Dents, divots and scratches may be impossible to remove which would defeat the purpose of using the shelf paper to protect your cabinets. Instead, choose non-stick versions that remain in place but can be removed easily and washed.

Wash Your Cabinets

Whether you use shelf paper or not, you should clean your cabinets annually. If you do use shelf covering, remove them and wash them thoroughly. While the covering is removed, clean the cabinet and drawer shelves as well. Allow the coverings to dry completely before replacing them in the cabinet.

Choose Padded Options

Today, you can purchase shelf coverings that are slightly padded which reduces the noise of dishes being returned to the cabinet. They also provide added protection to your glassware and dishes, helping to avoid breakage should something be knocked over inside the cabinet.

Open Shelving Options

If you have open shelving or glass-fronted cabinets, consider lining the back of your cabinets as well. There are many stylish patterns available today that add a splash of color to your kitchen. Adding patterns can also create a sense of depth in your cabinets.

If you are in the market for new cabinets, contact Flemington Granite today to learn what options are available. You can reach us by phone or by filling out the easy form online.

How Much Can My Granite Countertop Overhang?

How Much Can My Granite Countertop Overhang?

Everyone appreciates island seating, or counter seating in their kitchen. It adds a nice extra flair to the kitchen, and alleviates crowding around tables, and allows you to sit while working on complex meals. However, in the past, people have felt the need to forsake nicer counter top materials if they want to have this kind of seating available.

There are a lot of questions frequently asked about overhangs when you involve real stones such as marble or granite. Obviously, heavy stone like this usually needs quite a bit of support from the cabinets themselves, meaning that any kind of overhangs would be fragile if not impossible. But, is that true? Is it really impossible to install a granite overhang in the kitchen? The answer may actually surprise you, but some concessions do have to be made.

The assumption that stone cabinet top student support is entirely true, within reason. It all depends on the thickness of the stone, and what concessions you can make in order to provide additional support for the overhang. It may be surprising that the thinner the material, the more fragile and in need of support it is.

For a Thickness of 2 Cm

This is a more common thickness for granite in general, with a higher availability all around. Unfortunately, it’s the hardest one to provide a stable overhang with. Center stone like this, even when supported by the cabinets, still needs plywood or MDF to provide additional support. It’s a fragile stone at this thickness.

There are really only two solutions if you want to create an overhang with stone this thin – you can either place cabinets within 4 to 6 inches apart across the base, with a gap providing legroom, or you can use a thick steel plate underneath the overhang to provide additional support. There really is no other option when it comes to this sort of thickness.

For a Thickness of 3 Cm at Grades 1 through 3

Thicker granite tops like these are much more forgiving when it comes to an overhang. In fact, some of these materials can extend up to 12 inches, but you should consult your fabricator before attempting this. These grades have a higher tensile strength, which makes them less prone to fissures and cracks.

A general rule of thumb with these is to check for fiberglass support, or filled fissures along the material. If you see either of these, then you most likely can’t extend it into an overhang of any real measure. Still, you’re definitely usually safe to go up to 10 inches, sometimes upward of 12 with these grades of granite at this thickness. Again, consult with your fabricator before you actually attempt it.

For Grade 4 Granite

This grade of granite has very little tensile strength. As a result, you’re not going to get much more than 6 inches of overhang at best from it. Of course, if you’re attempting something like supported overhangs, most materials can be extended up to 24 inches past the cabinets.

To learn more about supported overhangs, and other ways to solve overhang issues with less durable grades of granite, fill out our contact form below or call us today. We’re happy to help!

Types of Granite Countertops For Your Home

Types of Granite Countertops For Your Home

Granite is a lovely stone. It can produce such beautiful grains and patterns, it’s durable, easy to keep clean. It’s one of the more affordable natural stone finishes as well, which means that while it’s not exactly cheap, it’s a frugal choice to finish a bathroom or kitchen with this material due to its staying power.

When most people imagine granite, they picture a grainy, smooth reddish or brownish stone – some of the more common varieties. However, there are actually many types of granite, colors of granite and styles of edge finishing for this stone. Granite is a whole world of variety and intricacy that is usually only known to contractors, stone experts and, oddly enough, archaeologists.
If you’re interested in granite countertops for your kitchen or bathroom, first of all, congratulations on choosing an excellent stone that’s an even balance of easy maintenance, beauty and affordability. Second of all, why not take a moment to learn about the various types, colors and finishing styles of this stone before even shopping? Enjoy surprising your contractor and stone worker with your extensive knowledge of this material. Save yourself time by being informed, and knowing which type you want right out of the gate.

First, let’s look at the types of granite and granite colors.

White Granite

White granite provide a more brightly-lit and clean/fresh vibe for your kitchen or bathroom, and being such a neutral color, can honestly work for most color schemes easily enough. It tends to have a milky tone, with the darker grains having a higher contrast as a result.

This has a mild disadvantage of being harder to clean due to the grains camouflaging things, but that can also hide a multitude of sins!

Moon White Granite

Moon white granite is one of the more common white granites, and is the pattern most imitated by synthetics. It has a peppered grain of whites, blacks and grays, which is easy to maintain, matches most tastes and can last eons.

Bianco Antico

Bianco antico has softer grain s of whites and gray or rusty hues, creating an etched or blotched appearance that’s more closely associated with antiquity. It can add a classic, fancier vibe to a kitchen or bathroom, and has a warmer vibe to it. It’s quite stunning and only seeing it in person can justify the description.

River White Granite

River white granite can only be described as gentle and flowing, with long streaks of gray on white, with flecks of usually reddish grain. It provides an organic, mellow atmosphere that’s easy to clean and blends with most motifs with ease.

Black Granite

Black granite convey a “modern” chic or clean look, and also match most motifs due to being a neutral color. Black granites reduce light for softer, more earthy vibes in your kitchen or bathroom. Black granite seems to come and go as far as popularity, being very big in the 80s and now making a large comeback.

Black Galaxy Granite

Like moon white, black galaxy is the most-imitated black granite pattern. This simple, tasteful stone is jet black with speckles of creams and whites, producing a professional, clean appearance that’s easy to clean and is unassuming and understated but quite stunning nonetheless.

Black Pearl Granite

This one tells a story as you scrutinize it. At first glance, it seems to have almost no graining to it at all, despite feeling welcoming and attractive. Upon a moment of study, the faint lighter grays reveal themselves in stages, adding an increasing intricacy to the countertop that can actually be almost hypnotic.

Uba Tuba Granite

Amusing name aside, uba tuba is the best of both worlds as black granite goes. Initially, it just feels like black galaxy, but as you study it, lesser swaths of darker grains reveal themselves, allowing for an initially stunning but continually surprising appearance.

Gold and Brown Granite

These are what most people actually think of when they picture granite in their mind’s eye. While many of these tend to honestly seem redder than brown or gold, they’re quite beautiful. The downside is, being less neutral, they’re less diverse as far as motifs are concerned.

Baltic Brown Granite

This is probably the granite most people think of, with its bubbly brownish red and black grains which are classic and appealing. You can stare at these forever, finding interesting new shapes and recognizable images not unlike watching complex clouds on a sunny day.

New Venetian Gold Granite

A lighter, streakier mix of browns, blacks and reddish cream colors, this is ideal for lighter kitchen or bathroom motifs. It’s also classic, with its warm and fresh appearance, and can extend the natural levels of sunlight organically.

Tan Brown Granite

Like Baltic, this has a somewhat bubbly, deep grain of dark reddish brown and black, excellent for rustic country kitchens or to accent ambient, earth-toned environments.

Gray Granite

These are sometimes mistaken for quartzite or marble due to their mix of black and gray. These are classic, often imitated and really fit with any environment, providing an elegance and neutrality other stones don’t.

New Caledonia Granite

This is very commonly imitated in synthetics, with its salt and pepper appearance of off white, gray and black speckling. If you want a contrasting, yet understated, lighter appearance, this is a good granite to go with.

Steel Gray Granite

This one is best described as a black and white image of nebulae or other space phenomena. Black with blotches of high-contrast gray and off-white, this one adds excellent contrast to lighter kitchens, or to compliment more softly-lit, ambient environments. It’s become a bit cliché, but is also regaining popularity.

Granite Edges

Now that you’re familiar with the more common types and colors out there, it’s time to decide what kind of edge you want. There are a few to look into:

  • Waterfall – Waterfall edges continue the material down the sides of the counters. This best suits islands or countertops that don’t end at walls. It’s pricier, due to the amount of material used.
  • Eased – This is the classic rounded edge that produces a soft, organic feel.
  • Straight – This is the traditional right-angle edging that’s honestly the easiest to produce and is therefore the most affordable. It’s common, but attractive.
  • Beveled – Beveled produces a modern appearance, using 45-degree angles rather than an eased curve or a straight edge. It’s not that popular as of now, but makes an attractive statement.
  • Ogee – This is a complex, harder-to-clean approach, with an eased groove at the base. It adds texture and personality, and can be quite nice, if you don’t mind cleaning it.
  • Bullnose – This produces a thinner appearance by shortening and rounding the edges. It’s honestly a difficult style to describe, but it does produce a distinct look that’s modern and sleek.

A final Note

You’ll find that there are also grades of granite, and some stones labeled as granite might actually be quartzite or a blend. There are distinct differences in these, that make for a whole thesis on their own.

To learn about these and more facts about residential stone work, fill out our contact form below and let us educate you in this fascinating material!

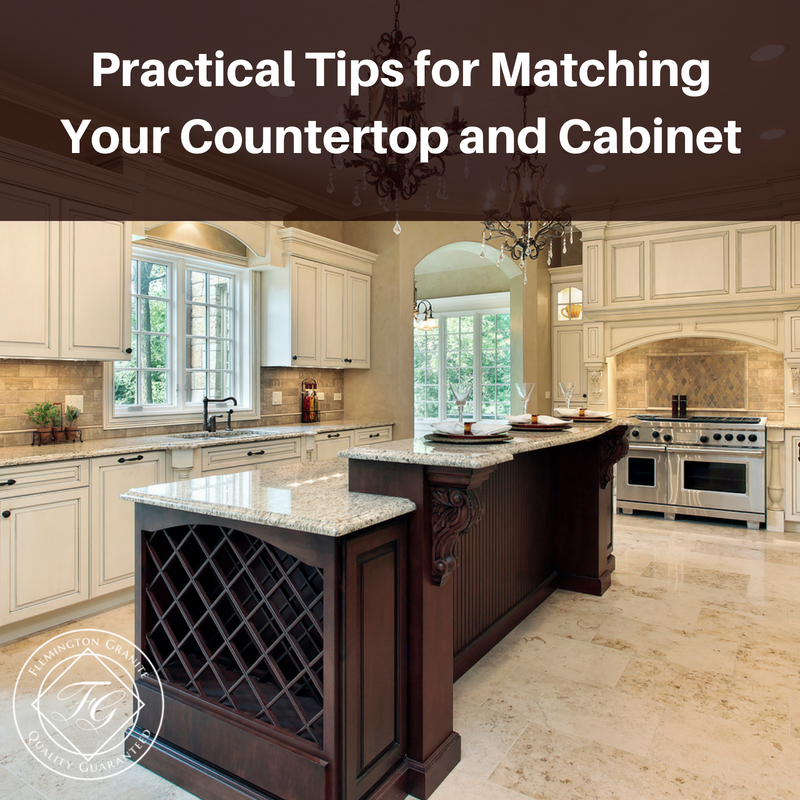
Practical Tips for Matching Your Countertop and Cabinet

Practical Tips for Matching Your Countertop and Cabinet

The housing market has changed a lot in recent history, some of this due in no small part to the fluctuations in the market itself. However, as the market takes an upswing, a common practice in modern times is to put a lot of work into upgrading the kitchen. A well appointed, spacious and attractive kitchen can be a make or break factor in the value of the house and its ability to sell quickly.

One of the things that goes out of style more quickly than anything else, aside from appliances perhaps, or cabinets and countertops. A quick look through all their television shows, or a simple archive of home photos shows how rapidly the aesthetic and these can change. However, when material that has never gone out of style is granite or marble, which are classic, enduring and associated with elegance and opulence.

However, it can seem pretty tricky to match your marble or granite countertop to your cabinets. Of course, there’s more to it than simple color coordination, because nothing’s ever that easy, now is it? The truth of the matter is, it’s not actually as difficult as it can seem. In actuality, there are two methods for coordination, and their rather simple concepts both with unique personalities.

Complementing

The more common, default approach is complementing. A complementary kitchen is one in which the caller of the cabinets and the countertops are similar shades of a shared base color, or a very similar color. Prime examples of this would be a mild cold granite paired with a light maple or hickory set of cabinets.

Another prime example would be a soft cream paired with a bold cherry or walnut cabinet. This approach creates a unified, gradient look based around a standard color or set of similar colors, often resulting in a mellow, toned down result. These are best suited for kitchens they get a lot of natural light, and are part of a home that goes for an overall more timeless aesthetic in general.
Most whom observed a complementary kitchen would describe it as either mellow, soothing or relaxed. Others have described this as warm.

Contrasting

A contrasting kitchen takes the opposite approach. With this style, distinctly different yet complementing colors are chosen that really stand out next to each other. A prime example of this would be an off black paint for your cabinets paired with a lighter quartz or pale marble countertop.

This sort of motif is often described as more modern, energetic and playful. Some have described it as having a stronger sense of cleanliness, with cooler undertones. This is more ideal where a lot more artificial light is used, or in-house is going for a more modern overall feel.

Other Considerations

Those feeling a bit more adventurous can get a little more in depth with their pairings, complementing or contrasting specific elements of the and/or the countertop. These subtler details can include the green or pattern in the granite, marble or quartz used, or the grain of wood in the cabinets. It’s actually entirely possible to both complement and contrasts in the kitchen by mixing a complementary or contrasting base color for the cabinets and countertops, while doing the opposite with the grains of one or both.

When done right, this can create an interesting synergy where a modern feel can be achieved with some warmth and timelessness at the same time, and working well with both natural and artificial light equally. This can be tricky to do, but it’s worth it if you can pull it off.

A Few Tips

  • – If you’re simply choosing a new countertop, and are happy with your cabinets, simply bring a drawer from your set with you when you go to shop for your stone. You can easily compare this with the available stones at your local fabricator to come to a combination you find appealing.
  • – Don’t hesitate to ask your stone fabricator for help, there vast knowledge of stone goes above and beyond just materials, cutting and production. They know how the stone is meant to function in a home, and they know what looks good.
  • – If you already have your granite, but need to choose a new set of cabinets, bite the bullet and order plenty of samples. They may add to your overall cost a little bit, but the accuracy with which you can coordinate and match both your countertop in your cabinets through this method are well worth it.
  • – Trust yourself, you may think you don’t have a lot of knowledge about home decoration, you may question your own personal tastes, but at the end of the day, most people have pretty good sense when it comes to color coordination. If you, and your family thinks it looks good, it probably does.

To learn more about this and many other home renovation and home improvement techniques, fill out our contact form, we’re happy to help you and provide you with many great specific examples of how these various styles of been implemented.

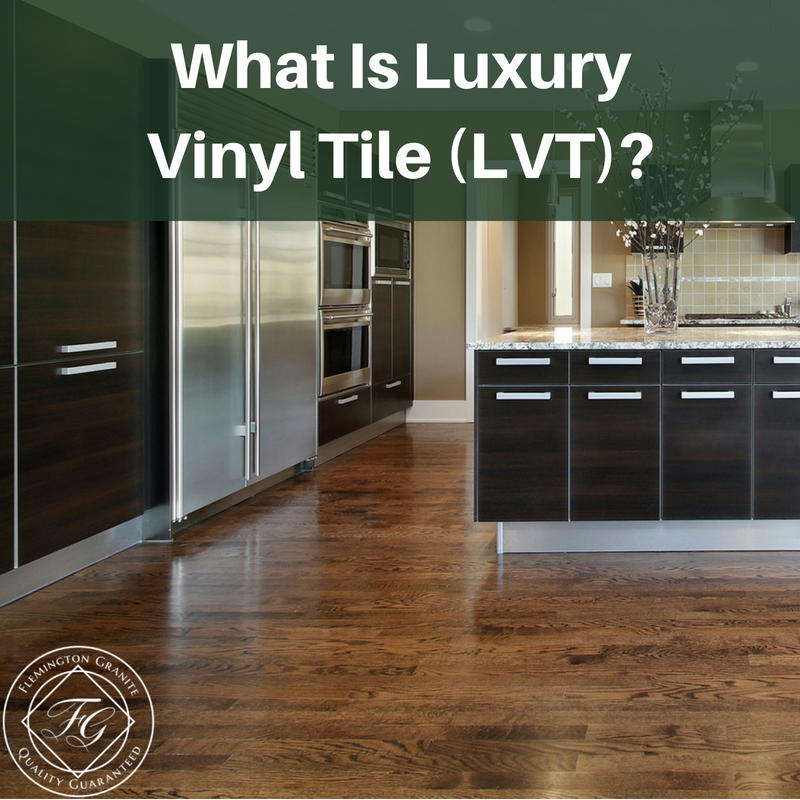
What Is Luxury Vinyl Tile (LVT)?

What Is Luxury Vinyl Tile (LVT)?

Many homeowners and consumers today are skeptical about vinyl tile. They may be recalling the days of walking on grandma’s orange and gold linoleum sheet flooring or watching those self-adhesive tiles curl up on their edges, not to mention the sticky feeling under foot, along with the ground in dirt that appeared impossible to clean, even with a scrub brush.

Vinyl has come a long way since then, as technology has changed the course of flooring products. Today’s vinyl tile has evolved to the point that it can be labeled luxurious as opposed to old-fashioned. How is a consumer to know what luxury vinyl tile, or LVT actually is?

Luxury Vinyl Tile (LVT)

The latest offerings in luxury vinyl far outweigh anything grandma could imagine. Vinyl selections today present a whole new concept in flooring, and the new luxury look has become one of the most appealing flooring choices in the market. It is not only easy to install but is durable and is usually completely waterproof, which makes it a flooring favorite for most applications, whether for commercial or residential use.

Luxury Vinyl Tile Fabrication and Components

Luxury vinyl tile (LVT) is fabricated from PVC, or polyvinyl chloride. It is a non-toxic material that provides the tile with a firm yet flexible consistency. It is supple and easily compressed and expanded with foot traffic, and is resistant to cracking.

Luxury vinyl tile contains four layers or components that are bonded together to create a durable and lasting tile that consists of the following:

  1. A flexible vinyl or cork backing
  2. A layer of vinyl color
  3. A photographic film layer that gives the vinyl its slick and neat appearance
  4. A final protective top layer that is comprised of either urethane or aluminum oxide. It is also called the wear or mil layer and adds the critical durability factor to vinyl. A luxury or quality LVT will have mil layers from 40 while a commercial mil layer will be 20 mil or higher

Adaptable and Unique

With durability in mind, LVT products are especially adaptable to any living space or situation. It stands the test of time with children, pets, awkward furniture and even high heeled shoes. Beyond durability, one outstanding feature is its ability to duplicate numerous other flooring choices that include ceramic tile, slate, mixed textiles, distressed and textural finishes, hardwoods, metal, stone, marble, bamboo and most any other type of flooring selection. Whether plank, sheet or tile, there is a match to be made.

Benefits and Features of LVT

  • Water and moisture resistant
  • Warmer, resilient and orthopedically sound underfoot
  • Ease of installation
  • Stain, scratch, scuff, dent, slip and fire resistant
  • Easily maintained
  • Superior durability
  • Realistic appearance
  • Budget friendly
  • Varied selections, sizes, shapes
  • Warranties available
  • Meets green building and sustainability standards

The transformation of vinyl tile over the years has seen an upsurge in the use of LVT by interior designers, commercial enterprises and everyday homeowners. The realistic offerings in luxury vinyl tile have made it possible to choose almost any look at any time, with the added benefit of a flooring that provides years of use with limited upkeep. If those prospects sound promising, complete the online contact form and a tile expert will get back to you with the information you need to find a luxury vinyl tile that meets your needs and lifestyle.

Save Money With Theses Kitchen And Bath Remodeling Tips

Updating your kitchen or bathrooms can bring you as much as a 100 percent return on your investment when it is time to sell your home. If you are considering a kitchen or bath remodeling project, you probably have many ideas in mind for what you want the rooms to look like when you are done, but may be concerned about the damage to your wallet. These simple DIY tips can help you get the look you want and still stay within your budget.

Don’t Replace Cabinets

Instead of replacing cabinets completely, consider resurfacing them in some way. Cabinets can be painted to match the décor you are seeking. You can also refinish them in a lighter shade if you are trying to lighten the room or a darker shade for a luxurious look. It may also be possible to remove the cabinets and rearrange them for better functionality and a different look.

Grab a Paintbrush

One of the easiest things to do in your kitchen or bathroom is to slap on fresh coats of paint to give the rooms a more updated look. Consider painting stripes or other patterns if you want to create a bold look. You can even paint appliances and other fixtures in order to give your rooms a makeover.

Shop Around

Too often, homeowners wander into a cabinet or home renovation store to choose cabinetry. However, if you want to save money on your remodeling project, you need to shop around in various locations to get the best deals. Look for showrooms that are remodeling or relocating as they may have excellent deals on cabinetry and other items. Check online for special deals that may be offered through a company website or for “liking” a page on social media. You may also find good deals at online sites like eBay or Craig’s List as well as in your own classifieds. Don’t forget to scour secondhand stores, thrift and antique shops who often have furnishings that work well in kitchens and bathrooms.

Be Flexible

If you are on a strict budget, you may need to be flexible about what you can install, but that doesn’t necessarily mean skimping on quality. If you are using a contractor, talk to them about leftover materials from other jobs to see if they can offer a deal. You may have to switch color schemes depending on what they offer, but the cost savings can be significant.

Think Retro

If you have sturdy, high-quality fixtures in your bathroom or kitchen, such as an old claw foot tub or metal cabinetry, consider a retro décor that will allow you to keep the fixtures but still update the room. You can paint metal cabinets and refurbish an old clawfoot bathtub. Add natural wood or marble flooring in the bathroom. Stainless steel sinks and faucets along with old-fashioned subway tile around refurbished meal cabinets is a great way to create a throwback look in your kitchen at minimal cost.

Sweat Equity

If you have any DIY talent, you can do a lot of the work yourself instead of hiring a contractor. Hire experts for the things in which you are inexperienced, but do the bulk of the work yourself. For example, you could hire a plumber and electrician for those areas of the remodel, but do the painting, tiling and refinishing on your own, saving a significant amount of money.

These are just a few ideas that can help you give your kitchen and bathroom a new look without breaking the bank. For more ideas on money-saving remodeling tips, contact us today by calling or filling out the simple form online.

Simple Bathroom Updates You Can Make Over The Weekend

Despite the fact that the average bathroom remodel costs around $12,000, you don’t need to spend that much to give your bathroom a fresh clean look. In fact, these simple ideas will allow you to update your bathroom in just one weekend. You don’t even need to have extensive do-it-yourself skills to accomplish them.

Scrub from Top to Bottom

It may seem like a simple thing, but a good cleaning of your bathroom can give it an updated look. Remove all curtains, shower curtains and decorations, giving them a good cleaning as well. Scrub light fixtures and any rusts or stains from shower curtain rods. If you have soap scum or hard water stains, do your best to remove them. Once you are finished, stand back and take inventory of the room. If there are areas you simply cannot get clean, like rust on a shower curtain rod, it is time to replace it. You may also discover while scrubbing that you need to recaulk the sink or tub surround.

Change the Walls

An easy way to update your bathroom is by changing your wall covering. You can choose a fun wallpaper designed specifically for bathrooms or choose to paint the room a bright, bold color. Want a truly unique look? Consider wainscoting designed for bathrooms rather than ceramic tile or other wall coverings. If you have tile walls that are chipped or cracked, replace the tile with a natural stone like slate or white ceramic tile that will remain relevant in the future.

Hardware and Vanity Changes

Sometimes, a simple change to the hardware in your bathroom can make all the difference. Update the drawer pulls and cabinet knobs. Even changing the towel rods and toilet paper holders can change the entire look of your bathroom. If your bathroom seems too cold, try adding warm fixtures like bronze faucets. If the vanity cannot be repainted or updated with hardware, you need to replace it. Many big-box hardware stores now carry prefabricated vanities that can be placed where the old vanity was fairly easily.

Lighting Updates

Add sconces on each side of the bathroom mirror or simply replace old, dated light fixtures for a quick uplift in your bathroom. If your bathroom doesn’t have much wall space, a dangling pendant may be the best option. A chandelier is a great addition to a large bathroom and can highlight unique features, like loft ceilings or a clawfoot tub.

Choose the Right Accessories

A really simple way to update your bathroom over the weekend is to replace accessories like the soap pump, tissue box and decorative items. Install a new bathroom mirror or medicine cabinet. If you want to create a relaxing bathroom, add lush plants, baskets, vases or bowls filled with river petals and natural bathmats. Paint the walls in blue and white tones for an added feeling of relaxation.

Storage Spaces

There is no question that adding storage to a bathroom can be difficult as space is often limited. The answer is to find storage space in different locations. Place open shelves above the door or the toilet, placing baskets or small storage boxes on them for added space. If you do have space in your bathroom, consider adding a cart on wheels or a corner cabinet for additional storage space.

These are simple, easy things you can do over a weekend to give your bathroom a fresh new look. If you need ideas for your bathroom remodel, contact us today by filling out the easy form or give us a call to learn what options are available.

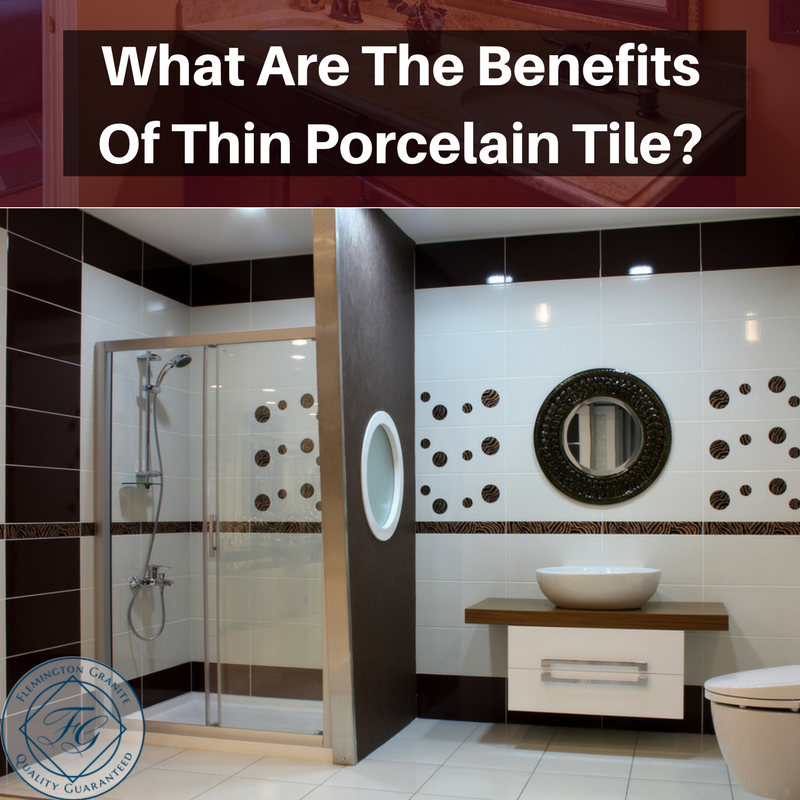
What Are The Benefits Of Thin Porcelain Tile?

What Are The Benefits Of Thin Porcelain Tile-

Porcelain tile has been used in kitchens and bathrooms for many years. At one time, it was one of the most popular options for tub surrounds and backsplashes in kitchens. Over the years, porcelain tile has been perfected significantly and is now available in a thin porcelain slab that makes decorating even easier. The lighter, more modern version has all the benefits of classic porcelain tile but is much easier to clean and an economical option.

Thin Porcelain Tile

Thin porcelain tile is available in large format porcelain panels that weigh just over two pounds per square foot. Despite the fact that it is lightweight, the tile is durable and resists stains as well as bacteria. The thin profile means that you don’t have to reinforce the cabinetry to accommodate the extra weight. It is also offers an easier and more affordable installation.

Fewer Grout Lines

Because the tile is available in large format porcelain panels, there are fewer grout lines that disrupt the pattern of your tile. This gives your project a sophisticated look and makes cleaning the tile much easier. Because it is lighter, you can also install the tile in areas where older styles of tile may have been too heavy, such as a wall or flooring. There are many projects where traditional porcelain tile would be too heavy or so expensive it would not provide a good return on investment, but thin porcelain tile works perfectly in those areas.

Look of Natural Stone

Thin porcelain slabs may be less expensive, but that does not mean you must sacrifice beauty in order to save money. The thin tiles look like natural stone so that most people will never know that you are using porcelain instead of granite or marble. You can find styles that mimic rich marble, exotic Travertine or sturdy granite. If you are trying to create a spa-like atmosphere in your bathroom, thin porcelain tiles that look like marble are the perfect choice.

If you are considering porcelain tile for your remodeling project, contact our customer service representatives by phone or by completing the easy form online. Our staff can help guide you through the process and provide you with more information about this light, modern porcelain product. No matter what type of stone you are considering, our friendly operators are standing by to help you choose the perfect addition to your home.

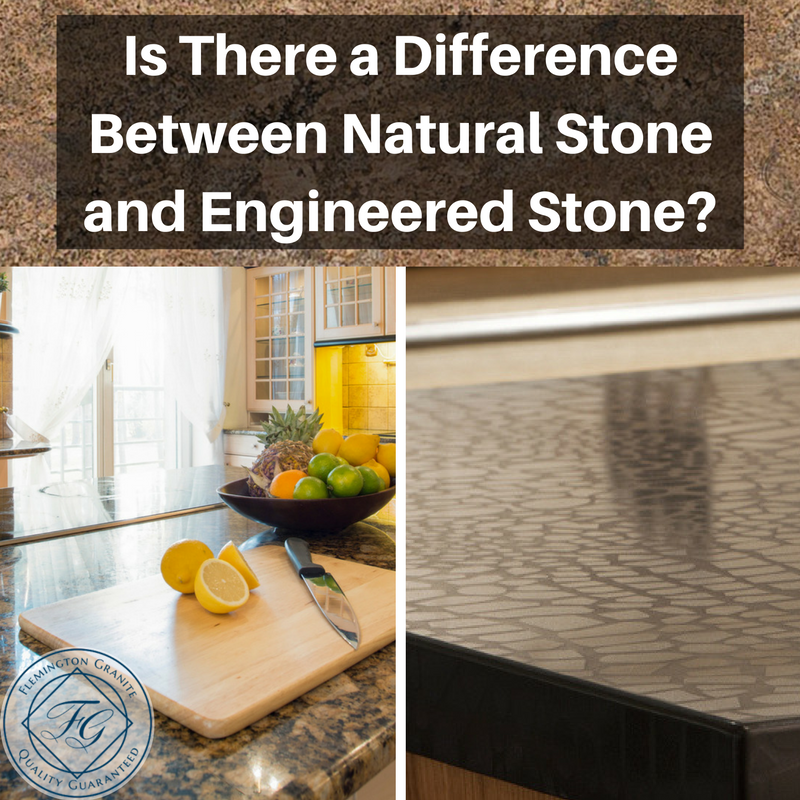
Is There a Difference Between Natural Stone and Engineered Stone?

Is There a Difference Between Natural Stone and Engineered Stone?

Stone countertops are durable and attractive, which is why they have grown increasingly popular over the past few years. However, natural stone can be extremely expensive which is why some homeowners are choosing engineered stone products instead. Before choosing a countertop surface, it is important to understand the differences.

Engineered Stone

One of the most popular types of engineered countertops is quartz, although they can be made from marble, granite and even semi-precious stone.

Engineered countertops are made from crushed natural stone mixed with a resin binder. The stone and resin are then molded together under intense heat then polished to a gloss or honed to a matte finish. This creates a non-porous material that is extremely durable yet as attractive as natural versions.

Benefits of Engineered Countertops

Although most natural countertops are non-porous, they must be sealed to retain the anti-bacterial feature that most people want in stone. There is no need for sealant to keep engineered stone non-porous. It is also more resistant to staining than natural granite or marble. It is very easy to maintain and is more resistant to scratching or chipping than other surfaces. There are also more colors and designs to choose from than with more uniform color and pattern options.

Precautions For Engineered Countertops

Although most types of engineered countertops cost less than natural countertops, some types can be expensive. It is important to understand that it is not real stone, although it does have the look and feel of natural stone. This means that it will not have the wide variations that marble or granite provide.

Engineered countertops, like their natural counterparts, are heat resistant. However, you should still use trivets and hot pads for pans that are taken directly from the stove or oven. Although the stone will not scorch, grit on the bottom of the pan could lead to scratches, even though this is less likely for engineered products than it is for natural versions.

There are many factors that must go into deciding on a type of countertop for your kitchen or bath. Engineered stone is an excellent option if you want the look of stone without the maintenance.

Contact our friendly, knowledgeable sales staff today to learn more about stone products and which will work best for your project. You can reach them by filling out the simple online form or giving them a call.

Flooring Comparison: Tile, Hardwood and Carpet

Flooring is one of the most common home improvement projects undertaken by homeowners, following kitchen and bathroom renovations. For many years, flooring options were limited, but today there are many different available, including cork or bamboo. However, tile remains one of the most popular choices for flooring. Tile comes in a wide range of options, are durable, require less maintenance than carpet or wood as well as other advantages that lead to its popularity. Before you choose your flooring style, it is important to do some flooring comparison.

Ease of Installation

Tile can be a DIY task for homeowners who have some home improvement skills, but it is very labor intensive. In addition, specific equipment like a wet saw is necessary for tile installation, which can often be rented from home improvement stores. Professional installation can cost as much as $3,700 for 500 square feet. Hardwood flooring often requires professional installation which can cost over $4,800 for 500 square feet of material, labors and delivery. Carpet must be installed by a professional and, although professional installation may be less expensive than tile or hardwood at around $2,900 for 500 square feet, it may need to be replaced sooner than other flooring types.

Flooring Repairs

Tile is easier to repair than other types of flooring as it may be possible to replace just a few tiles should they crack or break. In most cases, a homeowner can do this on their own. Repairing hardwood often requires having the floor refinished, which can be expensive. Laminate or floating wood floors are easier to repair as, like tile, sections can be replaced if they become damaged. Removing and replacing the damaged sections can be tedious, however as the floor may have to be taken up in order to get to the section. Carpet is the most difficult to repair as seams can unravel or edges pull from door sills. Carpet also stains easily and may look dated sooner than other flooring types.

Maintenance of Flooring

Tile is not difficult to keep clean and there are now machines that will help clean tougher stains in grout. Professional cleaners can also add luster to tile as well as remove tough stains from grout that you cannot remove on your own. Hardwood floors require only dusting, mopping or vacuuming on a regular basis, although stains may require professional cleaning which is similar to professional tile cleaning. Carpet is far more difficult to maintain as they stain much more easily than other types of flooring and some stains may be impossible to remove. Professional carpet cleaning is recommended at least twice each year to keep carpet looking fresh.

If you are replacing flooring in your home or commercial space, contact us today to learn what your flooring options are. We have products that can keep tile floors from feeling too cold and make sure that the products you choose will work in the space you plan to have it installed. You can reach us by phone or online for more flooring comparison.

7 Home Improvement Projects to Avoid

Home improvement projects can be fun and exciting, letting you design your home in whatever way that suits you. However, there are some home improvement projects that you should avoid. These home improvement projects to avoid not only don’t provide a good return on investment, they could make it difficult to sell your home in the future.

Pool Installation

Pools and hot tubs only appeal to a small number of people as many don’t want to deal with the upkeep necessary to maintain them. Pools can be costly, with price tags between $30,000 and $75,000. If you live in the Northeast, you can only use a pool for a few months out of the year, so your return on investment will be much lower than that of a homeowner in South Florida who installs a pool.

Built-In Aquariums

Aquariums are beautiful and there is research that an aquarium can provide a peaceful, relaxed feeling to a room. However, like pools, they require significant maintenance and upkeep. Therefore, a potential buyer may not see the benefit in a stunning built-in aquarium if they have no desire to take care of fish.

Home Office

Home office renovations can be expensive and it is not an addition that many buyers will find beneficial. If the room does not have a closet, it cannot be considered a bedroom and research indicates that home buyers would prefer an extra bedroom rather than an elaborate home office. Instead of creating an entire room for your office, choose a section of a room, add a desk, chair and good lighting that can be removed easily if you decide to sell.

Sunrooms

Although sunrooms can be beautiful and you may envision warm, sunny days sipping coffee and reading the paper, the fact is that sunrooms are expensive to install. Research indicates that a sunroom only recovers about 50 percent of our investment. Because sunrooms have a lot of glass which does not provide insulation, energy costs can be significant in both summer and winter.

Over-the-Top Landscaping

Although you want to landscape your home for curb appeal, expensive landscaping rarely provides a good return on your investment. Creating a backyard paradise or gardens in the front yard that look professional may not be a benefit to some homeowners who will feel as if they have to spend significant time on upkeep. Keep your lawn cut and your gardens weeded if you plan to sell your home, but don’t go overboard on landscaping.

Expanding a Garage

Adding on to your garage can give you a new workspace, additional storage or even space for another car. However, a garage addition can cost tens of thousands of dollars and it is unlikely you will recover your investment.

Jacuzzi Tubs

Jacuzzi, or whirlpool, tubs sound like fun and can be very relaxing. They are beneficial if you suffer from chronic muscle aches or joint pain, but most potential buyers will not pay extra for a whirlpool tub in a bathroom. Whirlpool tubs often come with higher energy bills and additional maintenance costs. They can also be difficult to install and you may be required to add a larger hot water tank that can be costly.

Before embarking on home improvement, be sure that it is not one of the home improvement projects to avoid. If you need assistance with your home improvement project, contact us today by phone or online to learn what products will best suit your needs.

Quick and Easy Ways to Get Your Home Ready for Winter

With the weather turning colder, it is time to begin thinking about winterizing you home before the truly bad weather sets in. Winterizing your home may feel like an overwhelming task, but there are ways to get your home ready for winter that are easy, quick and will help make the winter much more comfortable.

Windows and Doors

Install storm windows and doors as a storm door alone can increase energy efficiency by 45 percent. Storm windows and doors can also make it harder for thieves to break in. Replace old windows that may be causing you to lose heat from your house. Although old windows may have charm and character, they may be costing you money.

To repair drafty windows, caulk your windows and doors, making sure to smooth out the caulk lines with a wet finger. Draft stoppers can also keep cool air from coming into your home. You can make them yourself or purchase them at bed and bath stores. There is also window plastic available that is easy to apply and is virtually invisible. Be sure to remove all the air bubbles so it looks professional.

HVAC System

Your HVAC system works as hard in the winter as it does in the summer. Be sure to change filters often as dirty filters can restrict airflow. Have your HVAC system serviced at least twice each year, once in the spring and once in the fall. Service will cost around $200, but it may keep you from an expensive repair later in the season. Drain excess water from pipes to prevent them from freezing by opening the waste valve to turn off main water lines. Turn your thermostat down when you are not home, but do not turn your heat off as this could cause pipes to freeze. Turning your thermostat down ten degrees while you are at work can save you about 14 percent in energy costs. Set ceiling fans to blow down in the winter, pushing hot air from the ceiling and down into living areas.

Other Tips for Winterizing Your Home

Add additional insulation to your attic, walls, roof and ducts. Wrap pipes in insulation to help protect them from freezing and to save hot water energy costs. If you have a fireplace, use it to reduce energy costs and to keep rooms warmer. If lower temperatures make you uncomfortable, consider using a light long-sleeved sweater which can make you feel two degrees warmer or a heavy sweatshirt that can make you feel four-degrees warmer.

If you are ready to get your home ready for winter, consider these simple tips which are inexpensive and easy. IF you need advice for winterizing your home, contact us today online or by telephone to learn more.

How to Find and Hire an Interior Designer

How to Find and Hire an Interior Designer

The average person does not have experience in interior design. Granted, everyone has certain interior design aspects that they like, such as a certain color or the layout of pictures on a wall. However, interior design can be daunting to most which is why they hire an interior designer. Unfortunately for many, knowing how to hire an interior designer can be as difficult as designing the interior itself. These tips can help you not only understand how to find an interior designer, but how to choose one as well.

What is an Interior Designer?

Before knowing how to hire an interior designer, you may need to know what, exactly, an interior designer does. It is estimate there are approximately 68,000 interior designers working in the United States. They do more than just select wall colors or find the perfect rug. An interior designer should understand how you plan to use the space and how the contours angles and proportions of the space match your particular style. Most designers work with a network of contractors, retailers and artisans. They also work in partnership with their clients, exchanging ideas about what the room will ultimately look like.

How to Find an Interior Designer

Finding an interior designer is similar to finding any contractor to work on your home. However, you want to be sure that the designer has National Council for Interior Design Qualification Certification. You can call the American Society of Interior Designers to get names from their database or contact local design schools who offer placement for graduates. If you know of a family member or friend who has used a designer, contact them. Charities often put together show houses where designers create rooms in their own style. These usually occur in the fall and can give you an idea of the talent of a wide range of designers.

Interview More than One Designer

The first step in how to find an interior designer is to interview several before choosing one. Ask about their education, experience and professional memberships. Ask what other services the designer provides and whether they will pick up or deliver items that are ordered. Learn what visuals will be provided, such as sample board with swatches, paint chips, drawings or computer-generated renderings. Ask how they prefer to communicate with you. Will it be text, email or telephone calls. You will also want to know how quickly they respond to messages.

Discuss Expectations

You want to tell them your expectations from the beginning. If you want to see a variety of options, you need to communicate that to the designer. If you want to provide input into their decisions, the designer will need to know that. There are some designers who prefer less client input than others, so if you want to be deeply involved, that designer may not be right for you.

Discuss Costs

Interior designers charge a wide range of prices. Some charge an hourly rate of $80 to $119 while others charge a flat fee for the entire project. Some designers charge a percentage of the overall cost of the project. If your project is estimated to cost $1,000, the designer may add an additional $200, or 20 percent, to the cost for their fee. You need to discuss cost with your designer in order to void unexpected costs in the future.

One of the biggest factors in how to hire an interior designer is to choose someone who you can get along with. You want to feel a spark of connection during the interview and you want a designer who will ask about your style, thoughts and dreams. If you are considering a decorating project, contact us today to learn more about interior design options. You can reach us by phone or complete the easy form online.

Micro Additions: Just a Little Bump Out

Micro Additions: Just a Little Bump Out

It seems like it does not take long for us to outgrow our homes, that we just seem to need a little more space. It may be the need for a larger bathroom or a kitchen with enough space to sit and enjoy your morning coffee. Unfortunately, the budget may not allow you to add an additional room or create a giant, eat-in kitchen when you currently have a small galley kitchen.

Room additions can also be messy, intrusive and expensive. The good news is that you can add more space to your home without a massive home addition. Many homeowners are using micro additions to “bump out” and get a little more space.

What is a Micro Addition?

A micro addition, which is actually known as a bump out in the construction industry, adds just a small amount of space to one room. They add usable living space and can provide a fairly good return on your investment. There is usually no need to add foundation or install items like HVAC or plumbing which makes a bump out less expensive than a traditional home addition. You may need new wiring for lighting and if a bathroom bump out requires you to move fixtures, you could need a plumber, but in most cases none of these are necessary.

Less Invasive

One benefit of a bump out rather than a full addition is that it is less invasive in your home. A whole room addition can disrupt your household for several months. You may also be dealing with significant dust and debris throughout your home. It takes less time to complete a bump out and it only affects the room you are expanding, not necessarily the entire home.

Best Locations

Bathrooms are an excellent place to add a small addition. You could make room for a soaking tub or a large shower. Add a breakfast nook to your kitchen for more seating space. A bump out in the living room could act as a home office or a great homework location that will keep the kids less distracted. Storage space could be added to a bedroom or create that huge walk-in closet you have always wanted.

If you are on a tight budget but need to add some space to your home, consider a micro addition. You can create a larger, more practical room while also increasing your home’s value. If you are in need of added space in your home, contact us today to see how we can help. You can speak to any of our knowledgeable staff by calling us or completing the easy query form found on our website. We can guide you through the process and help you get that added space you have been dreaming about.